-40%
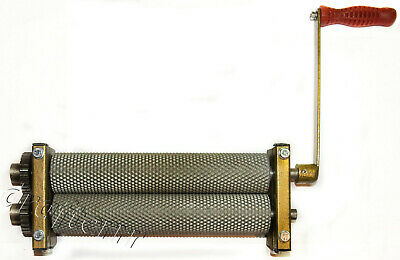
Foundation machine mill finish, Beeswax rollers for the production of honeycombs
$ 311.13
- Description
- Size Guide
Description
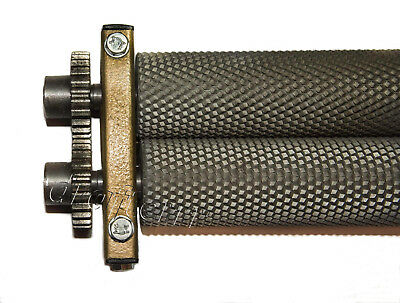
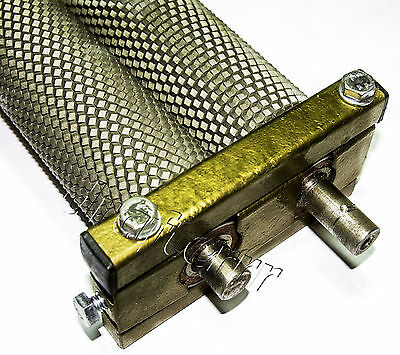
NEWBeeswax foundation mill with engraved rollers for production of honeycombs (angle cell: 120 degrees)
Specifications:
Dimensions (mm):
420 × 150 × 85
Weight (kg):
7,45
Engraving width (mm):
300
Cell size (mm):
5,4 ± 0,05
Diameter of the rollers (mm):
59
Angle cell:
120 degrees
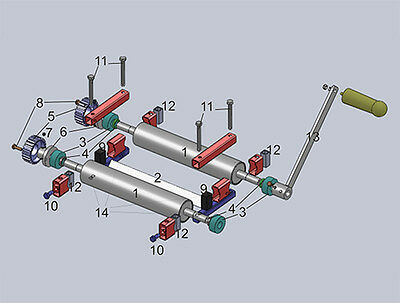
Materials and components used in the manufacture of this product, kit includes:
1. Engraved roller made of
high strength tempered steel with non-sticky polymeric coating
2. Base assembly
3. Bearing
4. Spacer ring
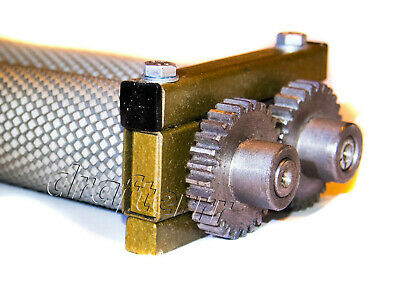
5. Pinion
6. Pinion spacer
7. Lock screw М6
8. Stopper bolt
9. Shock absorber
10. Set bolt М8
11. Fixing bolts М8
12. Frame spacer
13. Handle (random color: black or red)
14. Openings under basis fastening.
+ Manual (
Russian
/
English-as in the description here
)
Description:
The rollers are designed for smooth rolling tape or wax sheets and manually producing honeycombs. Angle rolls cell is 120 degrees, which corresponds to the marking "Max" (as close as possible to the natural angle for bees). Default beeswax rolls set to 11-12 sheets on 1 kilogramm (recomended thickness).
Production smooth plates:
Combs made of thin plates of wax which is most simply obtained by immersing or thin glass plates (or,for example,plywood) with a size of 400 × 265 × 3 mm in the molten wax (template edges are not to be beveled.) Good practice is to have a wooden board dipped into oversaturated salt solution beforehand (concentration is reached when salt stops dissolving). Then a template should be put into cold water (6-12°C) for 6-8 seconds. If you are using glass template, add some wash up liquid into the water: that will prevent wax sticking to template.
After that shake the template or wipe remaining water with a sponge and put it into liquid wax. Use a container of appropriate size for this purpose; the most common size of wax container is: length 280-300mm; width 40-50mm; height 410-450mm. Material of wax container should be inert to wax: stainless steel, aluminum, white iron or galvanized white steel (worse).
The immersion and taking out a template of the molten wax should take place without delay. 3-4 seconds it is cooled in air and then dive again and taking out. Thus, layer after layer is formed by a smooth sheet of wax. Usually it is sufficient to repeat the procedure 3-4 times to build up a sufficient thickness of the template. Procedure of releasing wax sheet from template is as follows: clean edges with a knife, carefully pry off a sheet and cautiously pull it out from the template. Sheets thickness might be non-uniform being greater on top; up-end a template with every dip to avoid that. Use water bath for maintaining temperature needed to keep wax liquefied; electric heater can also be used for this purpose.
Installing the roller:
It is best to install the rollers on the board of any thickness chipboard, whose plane is 680 × 345mm. Edge should reliably paint over the paint to isolate it from moisture. Four pieces of wood 30 mm high and 20 mm in width must form together with chassis roller tray, which will subsequently be poured release agent solution. The first board is fastened with screws to the bar of 345 mm. The next step should be close to the bar to attach the body rolls. rilling holes in a board for fixing it on the roller could be difficult. Make a jig to get the desired precision: apply a list of hard paper from below of the rollers and mark holes in the frame and base outline. Use the jig to mark holes to be drilled in the board.
Next on the perimeter of the remaining three bars are sewn. Apply mastic of liquefied wax to all joints. The variant using as bath galvanized steel, note:use a tray of appropriate width corresponding to rollers frame width, so not to hinder handle 13 rotation and not to brush pinions 5.
Preparing for rolling:
Formed with the board bases tub filled with a liquid release agent. As such a composition can take honey Situ liquid or a solution consisting of glycerin soap or other soap white odorless, which adds a certain amount of glycerol (in 1 liter of water and 100 g of soap 2 h. Spoon glycerol). In Situ 1g can add funds to attract a swarm of containing a queen bee pheromones. Careful rotation of the handle, make sure that the rollers rotate easily. This wetting achieve both shaft surface 1.
Rolling:
Through laminating rollers engraved workpiece to be smooth, that have been made in advance and lie down had a few days in air at room temperature. Aged smooth sheets have greater strength in comparison with the just manufactured workpieces.
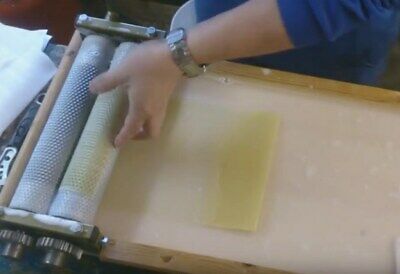
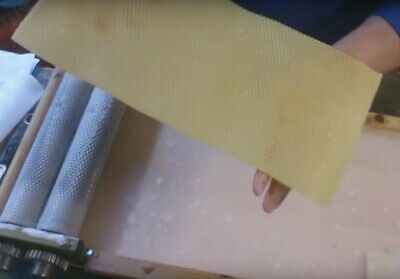
Smooth waxy leaf is placed in a bath of liquid separation, and moving forward with your left hand. Its front edge 2 abuts on the guide into the gap between the rollers. At this time, the right hand should gently turn the handle on my own. Upon taking out ready-made foundation from the rollers it can be difficult to separate the sheet from engraved surface. Laying thin polyethylene stripe on wax sheet fore-part could help. Wrapping up the whole wax sheet when the use of parting fluid is not required proved to be useless.
Some wax may adhere to engraved surface in the process. Use pointed stick to remove it and then clean the rest with a brush moistened with gasoline, turpentine or oil dissolvent. Before cleaning operations pour off liquid from the bath, otherwise it can absorb foul smell. After removing wax from the rollers wash them with soapy water and cleanse with pure water. It is strictly prohibited to use metal tools for cleaning rollers - plastic coating can be damaged.
Adjustment:
The device is shipped with thickness settings to produce 11-12 sheets from one kilo since this thickness is considered optimal for wax foundation. However thinner sheets might be needed occasionally, for instance to equip frames for section honey. Set bolts 10 are used to change rollers gap 1: to reduce the gap rotate both set bolts 10 clockwise; do the opposite to increase the gap. Rotate the bolts alternately making 1/6 of a turn. If your foundation is shifting sideways, either tighten the bolt at that side or loosen the bolt at the opposite side.
Matching rollers engravings:
Foundation cells must have same level of transparency; in case they do not, the adjustment is needed. Loosen lock screws 7 on the close roller pinion-side. Put paper in the top-end of the gap between rollers 1 and squeeze it slightly by rotating the handle 13. That will make rollers 1 cavities and lugs match. Tighten lock screws 7 in this position.
Warning:
When operating the rollers, keep in mind that foreign particles may adhere to smooth sheets, causing damage to engraving. Watch pieces being rolled carefully and keep working area clean.
Maintenance and storage:
In the end of its rollers, they should be rinsed with clean water and dry. Keep gear in a dry place at temperatures between + 5 °C to + 40 °C.
International Buyers Please Note:
Import duties, taxes and charges are not included in the item price or shipping charges.
These charges are the buyer responsibility.
Made/Shipping from Russia Federation.
Check out my
other items
!
Be sure to add me to your
favorites list
!
----------------------------------------------------------------------------------------------
Payment method
Only PayPal
Shipping
- If you have additional questions or specific wishes to the order, sending and etc, please ask
BEFORE !
payment.
-
Shipping
with tracking number
.
Return policy
-
No returns accepted
Feedback & Contact us
-
If you have any questions, please feel free to email our service specialists 24 Hours a Day, 7 Days a Week.
-
We greatly appreciate your
POSITIVE
feedback. Please do
NOT
leave negative feedback without asking for help.
-
Our aim is to provide
Top Level Customer Service
, normally so we will try our best to solve any problem
.
-
Please DON’T leave negative or neutral feedback if you haven’t received item in 30 days, because we have mentioned the shipping time repeatedly.
Thank you for your interest &
Good shopping!
=)
